

TP-Link Archer
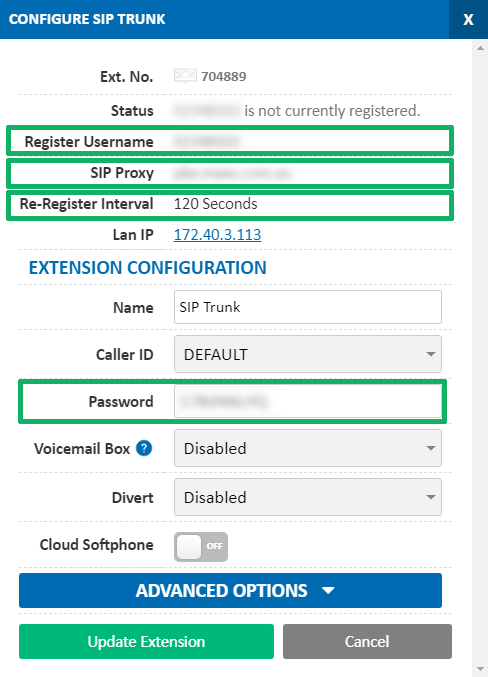
Before you begin, ensure that you've created your extension in the My Account Portal, https://my.maxo.com.au/. To retrieve the details of an existing extension, or create a new extension, login to the My Account Portal and select SIP Trunks from the menu. If you're creating a new extension, click the Add Extension button, fill in the details and click Save. For additional information on creating an extension, please see Portal Guide - PBX Extensions and Sip Trunks Find the extension number you're configuring, then click Edit. Take note of the following fields, highlighted in the image below, as you'll need these to setup the device. Note that if the extension is already configured on a device, you'll need to reconfigure, power down or factory reset the currently connected device before the required information will be displayed.
Open up your web browser and navigate to your router's login page. This can normally be accessed by entering 192.168.1.1 or http://tplinkwifi.net, but may be different depending on your configuration.
Once logged in, select Basic, then choose Telephony.
Select the + Add button to create a new account, then enter the following, copying the details from the My Account Portal:
- Phone Number: Register Username
- Registrar Address: SIP Proxy
- Authentication ID: Register Username
- Password: Extension Password
- SIP Proxy: SIP Proxy
- Outbound Proxy: SIP Proxy
- Register via Outbound Proxy: Checked
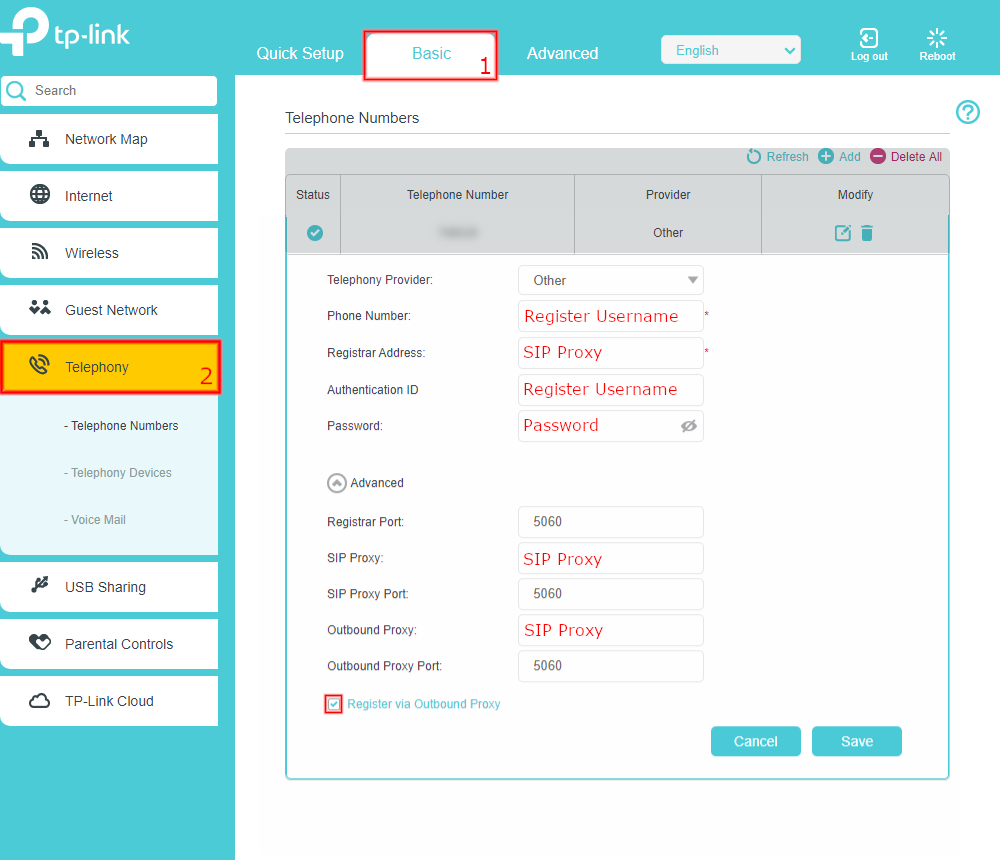
Once all fields are filled out, click Save.
 Australian Sales team about our phone system plans?