

Using Hot Desking
Hot desking, or agent logins, allows you to take your Hosted PBX extension with you as you move around the office or between sites.
Before you can employ hotdesking, you'll need to have created extensions for any hot desking users. For information on creating extensions, please see Portal Guide - PBX Extensions and Sip Trunks
Handset Requirements
Hot desking is supported on all Yealink T4XS desk phone (eg. T42S, T46S), Yealink T5X desk phone (eg. T53W, T58A) models that can be enrolled in our automatic provisioning, and any Grandstream GRP handsets purchased from MaxoTel.
Please note: Yealink phones purchased from third party suppliers may be added to the MaxoTel provisioning system, however we're unable to guarantee initial success or ongoing support. The phones may have already been added to another retailers provisioning service, or may be moved to the original retailer's provisioning service by Yealink, without notice.
Note that the Yealink G models (eg. T42G, T46G) of handsets may not work consistently. We recommend that all phones are upgraded to the latest firmware version.
Logging In and Out
Using the Handset
When a phone first connects, or is otherwise logged out, the top left key on the handset will display a Login button.
When the user presses this, they'll be prompted to enter their Hotdesk Login and Hotdesk PIN (if applicable). Once entered successfully, the phone will download the user's profile and may reboot.
To logout of a phone, the user dials *56
On some older models, once the logout has been dialled, the user may need to manually reboot the handset (hold the X key for ~8 seconds) before they're logged out.
Using the My Account Portal
To log a user into an extension remotely, locate the phone under Configured PBX Extensions, then select the user's profile in the Profile field. This will instruct the phone to log the extension in.
To log a user out remotely, locate the phone that the user is logged in to under Configured PBX Extensions, then select Logout from the Profile field. This will instruct the phone to log out.
On some older models, the user may need to manually reboot the handset (hold the X key for ~8 seconds) before the change is effective.
Setting up a Phone for Hot Desking
New Phones
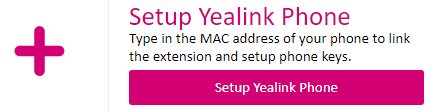
| To enable hot desking for a newly purchased device, login to https://my.maxo.com.au/ and select PBX Extensions, then click Setup Yealink Phone. |
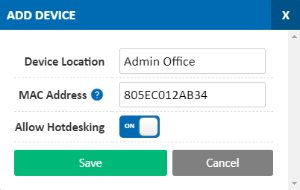
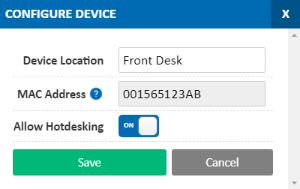
| Enter your Device Location (eg. Reception or Front Desk), then enter your device's MAC Address and enable Allow Hotdesking. Click Save to proceed to the Edit Profile screen. |
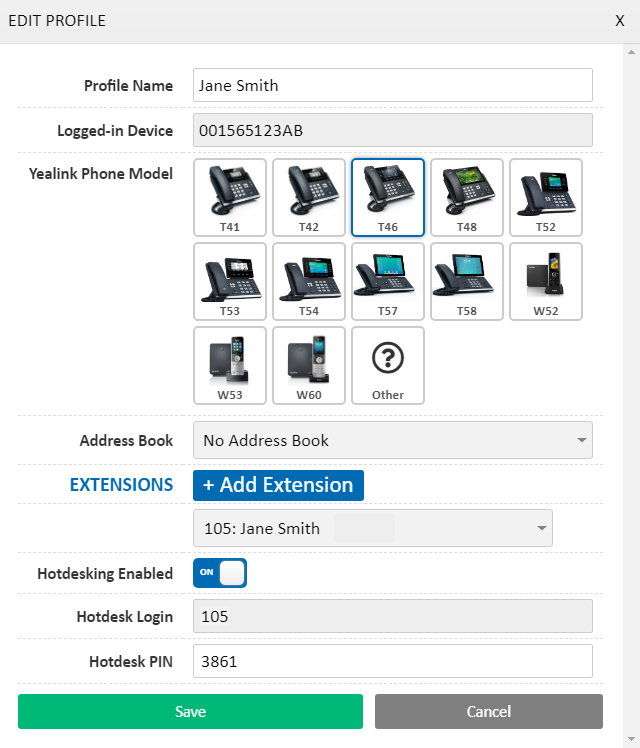
| Enter a Name for the user's profile (eg. Jane Smith), then select the Phone Model they'll be initially using. Select the Extension that should be bound to this user's profile. Note that each extension can only be used on a single phone at a time. Ensure Hotdesking Enabled is set to On, then take note of the Hotdesk Login and optionally set a PIN for the user to enter when logging in from a phone. |
Existing Phones
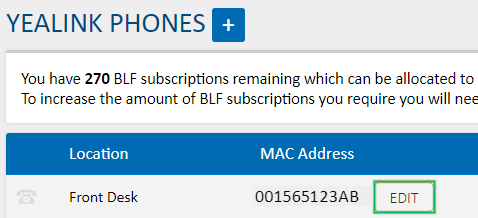
| To enable hot desking for a device already enrolled in provisioning, login to https://my.maxo.com.au/ and select PBX Extensions, then locate the phone and click Edit next to the device's MAC address. |
| Enter your Device Location (eg. Reception or Front Desk), then enable Allow Hotdesking. Click Save to proceed to the Edit Profile screen. |
| Your existing automatically provisioned phones will have their configuration automatically converted to a profile. Locate the existing phone assigned to the user, then click the Edit Profile button, then Edit Profile Settings. To enabled hostdesking, ensure Hotdesking Enabled is set to On, then take note of the Hotdesk Login and optionally set a PIN for the user to enter when logging in from a phone. |
Managing User Profiles
User Profiles store the user's extension settings, along with any DSS Keys (BLF monitoring, speed dials, etc.) that will be downloaded onto any phones they log in to.
Editing an Existing Profile
To edit a profile, either select it from the Select a profile to configure dropdown or locate the phone it is assigned to and choose View Profile.
If you need to edit the phone's provisioning profile, including the assigned extension or address book, click the Edit Profile Settings button.
Adding a New Profile
To create a new profile for a user, locate either the phone they should be logged in on, or a spare device, then in the Profile field, choose +New Profile from the dropdown.
Please note that, if another profile is logged in on this phone, it will be logged out.
| Enter a Name for the user's profile (eg. Jane Smith), then select the Phone Model they'll be initially using. Select the Extension that should be bound to this user's profile. Note that each extension can only be used on a single phone at a time. Ensure Hotdesking Enabled is set to On, then take note of the Hotdesk Login and optionally set a PIN for the user to enter when logging in from a phone. Once done, click Save and to be redirected to the DSS Key setup screen. |

Configuring Keys
You will be presented with a picture of your handset, along with the keys available for configuration. To add a function to a key, click the key or the corresponding section on the display.
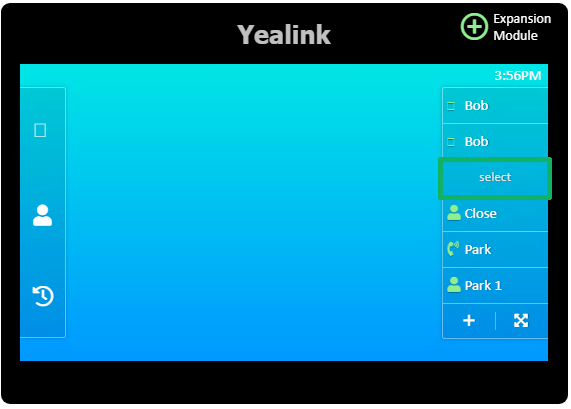
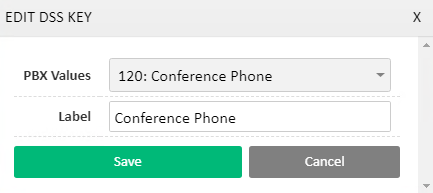
In the resulting popup, you can select which function you'd like the key to perform, along with the target and a name for the key. For example, choosing another person's extension will configure a BLF and Speed dial key, which will show if they're on the phone, and act as a speed dial to them when pressed.
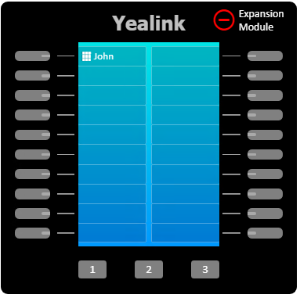
If you have an expansion module, click the + Expansion Module button to show and allow configuration of the additional keys provided. These are configured in the same way, by clicking their line key or corresponding screen section.
![]()
Available Key Types
Line Key: This is a special key type that configures one or more buttons to handle calls coming in to your extension. Grandstream phones require at least one line key assigned on the first page to make/receive calls.
PBX Extensions: Configures a key that monitors the state of another extension (eg. on the phone, ringing, available) while also allowing for quick transfers and speed dialling.
External Numbers: Sets up a speed dial key for a number found in Hosted PBX > External Numbers
Timeswitch Positions: Use a key to quickly switch between timeswitch favourites (eg. Lunch timeswitch override). For more information see Time Switch Setup
Call Parking: Configure a key to park a caller and additional keys to monitor individual parking lots, enabling parked caller retrieval. For more information see Call Parking Guide
Custom Values: This allows you to setup a custom key on your handset of either BLF (same functionality as PBX Extensions), Speed Dial (same functionality as external numbers), Line (additional line keys) or Call Park (same functionality as call parking) but manually specifying the target number or extension.
While most keys will synchronise automatically, you can force a resync by clicking the Save & Sync to Phone button.
Removing a Profile
Should you need to remove a profile, for example to remove an associated extension, you can do so by:
- Log out the profile from the phone (if applicable)
- Selecting the profile from the Select a profile to configure dropdown
- Choose Actions at the top left of the profile configuration box, then select Delete Profile
 Australian Sales team about our phone system plans?