X-Lite / Bria for Windows and Mac
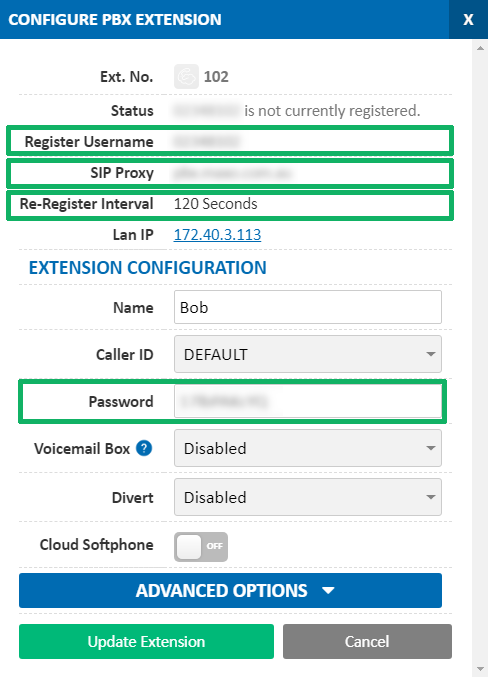
Before you begin, ensure that you've created your extension in the My Account Portal, https://my.maxo.com.au/. To retrieve the details of an existing extension, or create a new extension, login to the My Account Portal and select PBX Extensions or SIP Trunks from the menu, depending on your service type. If you're creating a new extension, click the Add Extension button, fill in the details and click Save. For additional information on creating an extension, please see Portal Guide - PBX Extensions and Sip Trunks Find the extension number you're configuring, then click Edit. Take note of the following fields, highlighted in the image below, as you'll need these to setup the device. Note that if the extension is already configured on a device, you'll need to reconfigure, power down or factory reset the currently connected device before the required information will be displayed.
So we can provide you accurate instructions, please select your Bria/X-Lite version below.
To configure your Bria Solo phone, first signup for an account with Counterpath and select your plan, or login to your existing account.
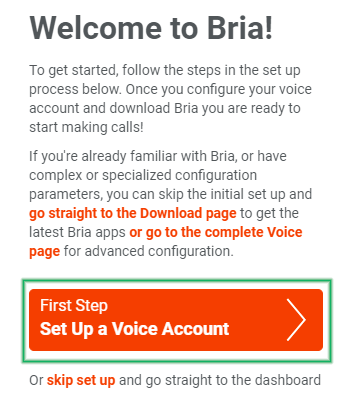
Once logged in, select Set Up a Voice Account
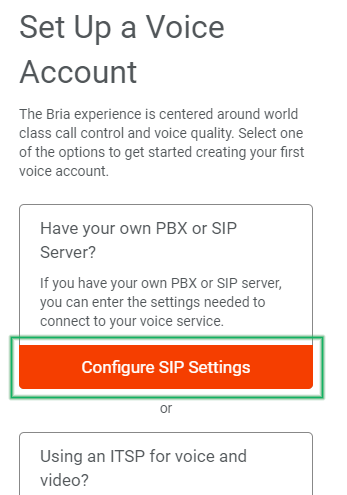
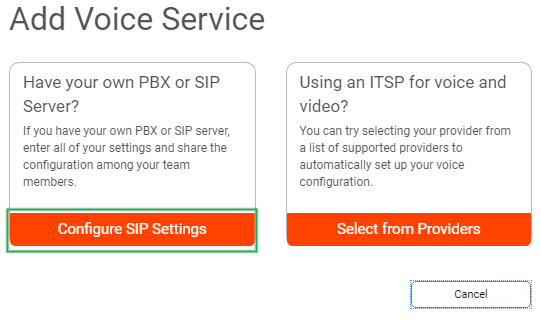
Select Configure SIP Settings
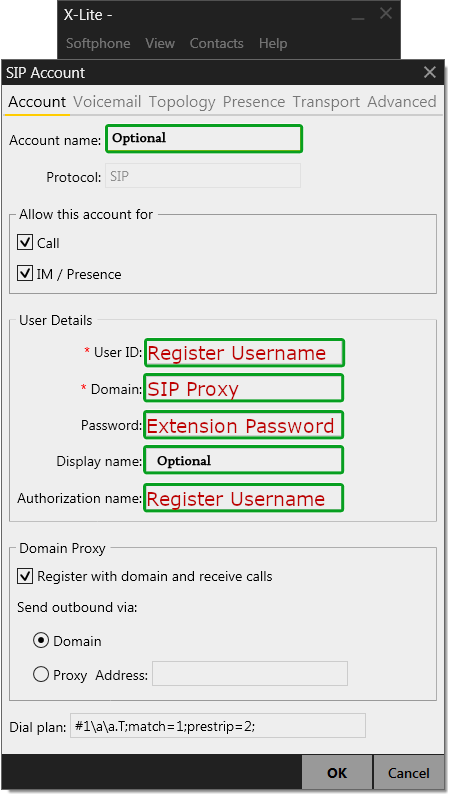
Copy the details from your extension to the configuration page, as below:
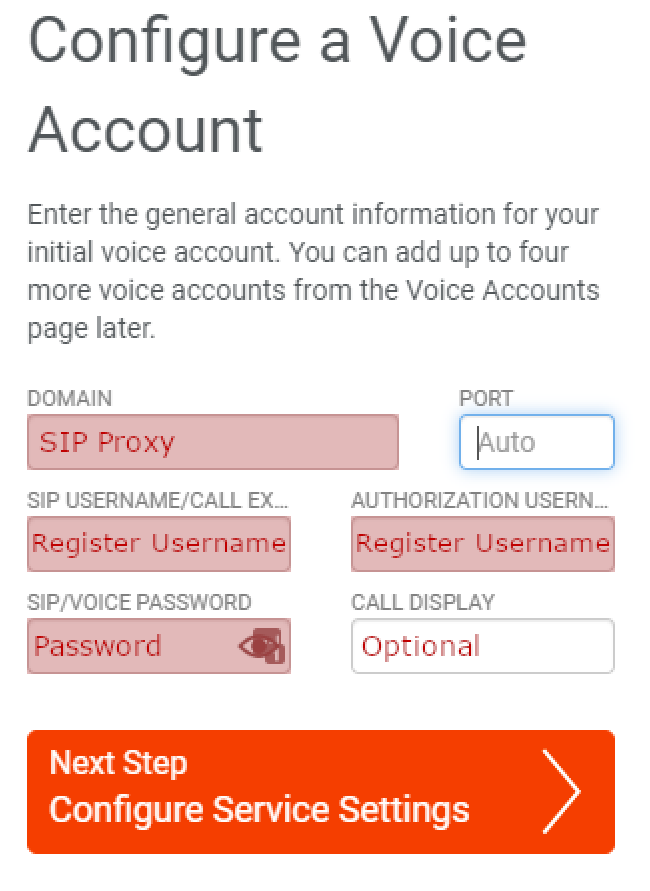
Domain: SIP Proxy (eg. sip.maxo.com.au or pbx.maxo.com.au)
SIP Username: Register Username
Authentication Username: Register Username
SIP/Voice Password: Extension Password
Call Display: Your Name (Optional)
Once done, click Configure Service Settings
Set the service settings details as below, copying the SIP Proxy from your extension's details.
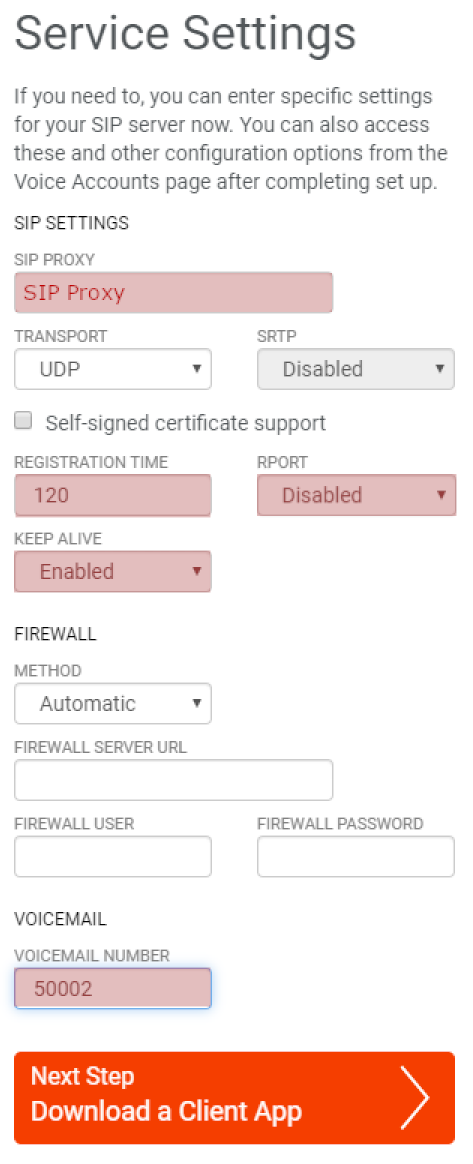
SIP Proxy: SIP Proxy (eg. sip.maxo.com.au or pbx.maxo.com.au)
Transport: UDP
Registration Time: Re-Register Interval
Rport: Disabled
Keep Alive: Enabled
Voicemail Number: 50002
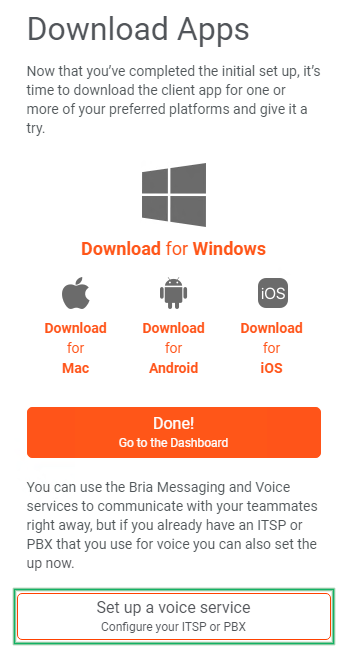
Once done, click Download a Client App to download the actual Bria application. When it launches, sign in using your Counterpath username and password, which will automatically configure your softphone.
To configure your Bria Teams phone, first sign up for or log into an existing account on the Counterpath wesbsite
If you're new to Bria, proceed through the account setup and team invitations, then at the Download Apps page, choose Set up a voice service
If you've been using Bria Teams previously, choose Voice and Video, then click the Add Voice Servers and Services button

Select the Configure SIP Settings button from the presented options
On the New Voice Configuration prompt, set the following, copying the SIP Proxy from the Configure Extension box (this will normally be either pbx.maxo.com.au or sip.maxo.com.au )
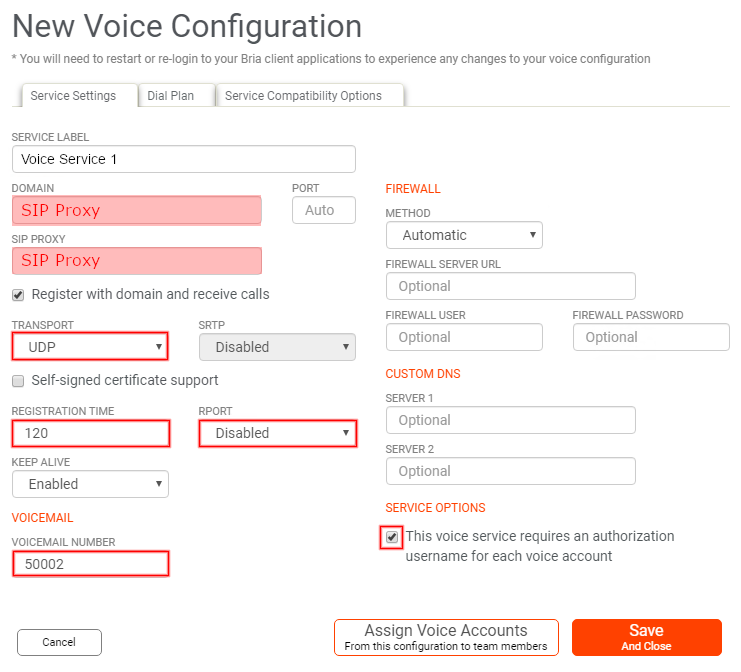
Domain: SIP Proxy (normally pbx.maxo.com.au or sip.maxo.com.au )
SIP Proxy: SIP Proxy (normally pbx.maxo.com.au or sip.maxo.com.au )
Transport: UDP
Registration Time: 120
RPORT: Disabled
Voicemail Number: 50002
This voice service requires and authorization username for each voice account: Yes
Once set, choose Assign Voice Accounts. For each team member you invited, click the ![]() button, then enter the credentials, copying Register Username and Password from the Configure Extension box.
button, then enter the credentials, copying Register Username and Password from the Configure Extension box.
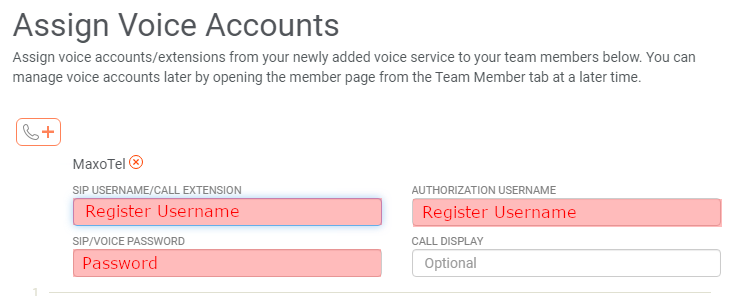
Sip Username/Call Extension: Register Username
Authorization Username: Register Username
SIP/Voice Password: Password
Once all your team member's credentials have been added, choose Save and Close. You can now download the client apps and have each user login with their team member email/password.
To configure X-Lite/Bria to your MaxoTel account, first download and install the program. Run the application and Click 'Softphone' then choose 'Account Settings'
Here you will place your Extension information and the SIP Server (sip.maxo.com.au for Residential and Sip Trunk accounts, and pbx.maxo.com.au for Hosted PBX accounts) as per the below screenshot shows:
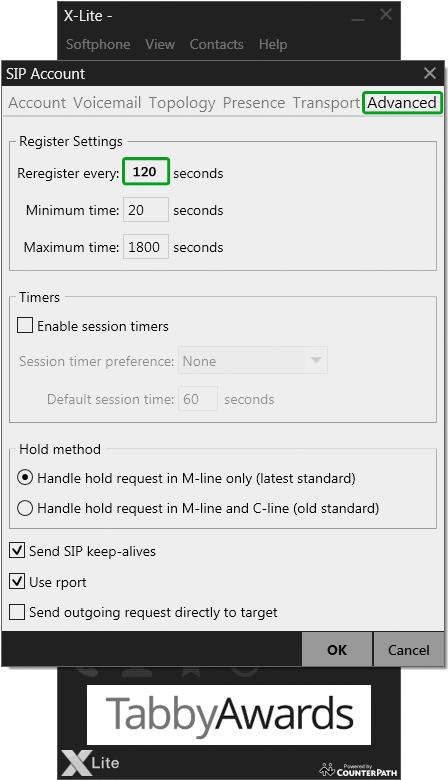
Now click on the 'Advanced' tab at the top right. Change the "Register Every" to 120 Seconds. Now Click 'OK' at the bottom.
If you have any troubles making and receiving calls from here on in, please give MaxoTel a call on 1800 12 12 10.
 Australian Sales team about our phone system plans?