

Medical Practice PBX Setup Example
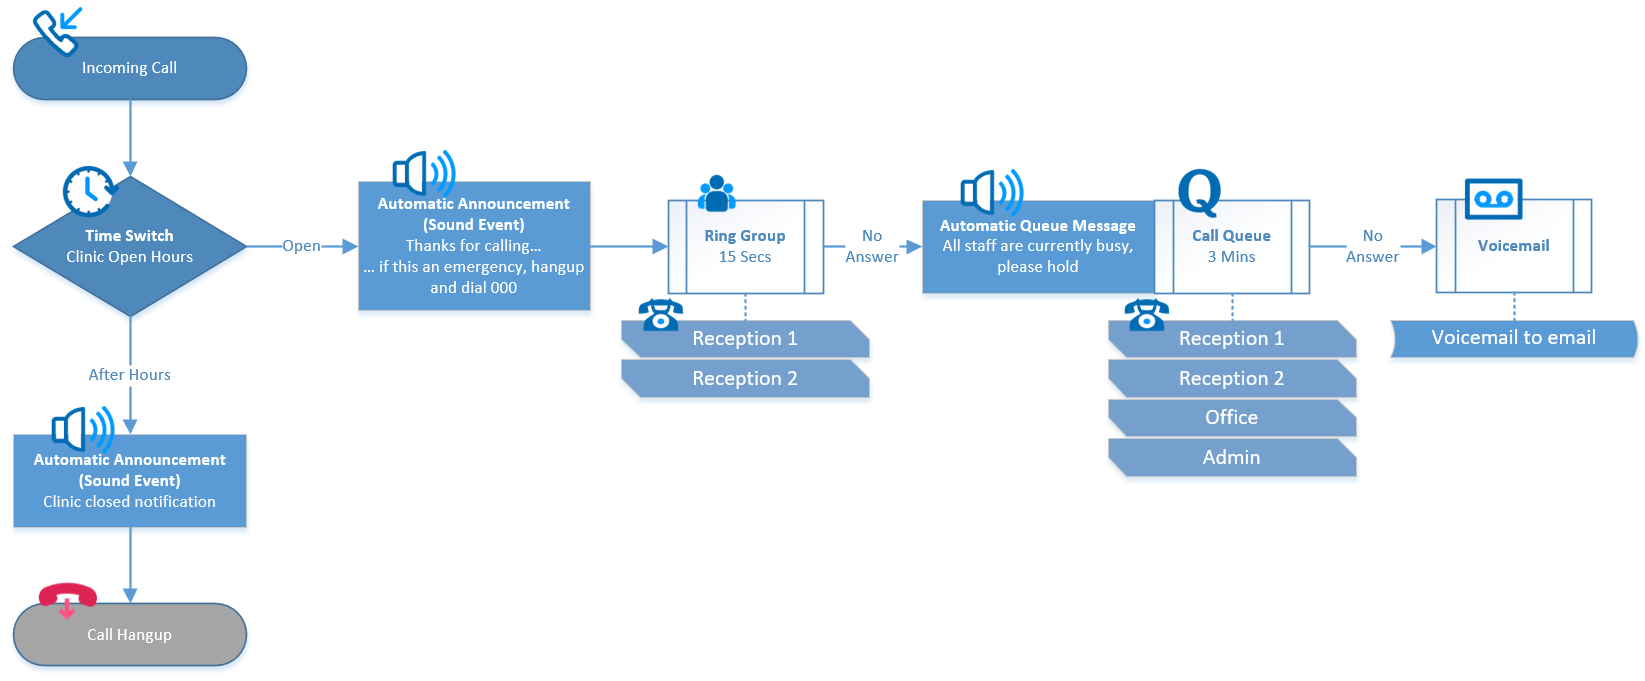
This example details one of the most common setups for medical clinics. It takes inbound calls to a main number, checks if the medical centre is open and, if so, plays a greeting before passing the call to a ring group of multiple reception phones. If the reception phones don't pick up (for example, if they're on a call), the callers are passed into a queue where they're played an announcement that staff are currently busy before calling several extensions. If the call is still unanswered, the caller is routed to voicemail and any messages are left are sent to the practice email address.
If a call is received outside of the clinic's hours, the caller will be played a message before the call is disconnected.
The following setup steps are completed through https://my.maxo.com.au/
Before you begin, we recommend setting up your extensions and handsets. For more information on this step, please see Portal Guide - PBX Extensions and Sip Trunks
Phone Number Setup
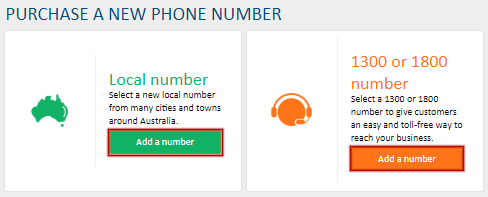
On the left hand side, choose Number Routing. If you already have a number you wish to use for your main number, for example if you've ported a number in, please skip to phone number routing. Otherwise, please select Add a Number and select your location.
In the Location field, select the location you'd like a number for, or the type of number. From the presented list, select one or more of the presented individual numbers or number ranges.
The system will show you any applicable charges for your number selection. If you need to remove a number, you can either deselect it in the number list, or click the X in the charge summary table.
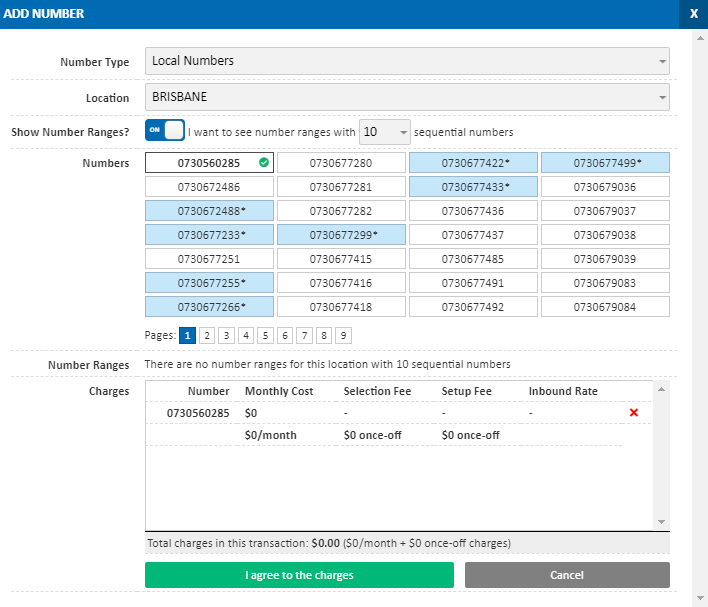
Once you're happy with the selection, click I agree to the charges and the number will be allocated to your account.
Phone Number Routing
To set the destination for your number, find the number in the Current DIDs list and click Edit

In the Route To: field, choose Time Switches, then New Time Switch.

If this is the first time you've configured this number, you will need to assign an IPND address. For more information about IPND, please see What is IPND?
Time Switch Setup
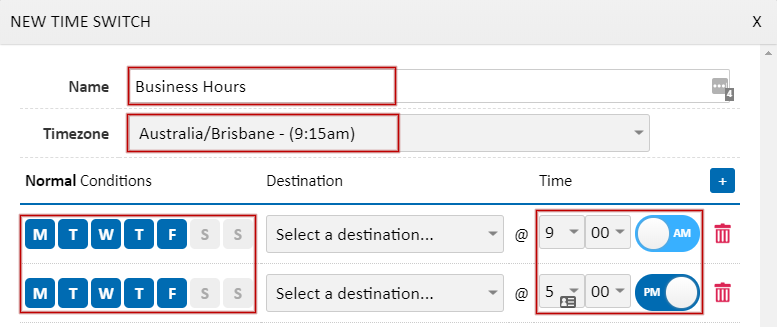
Provide your time switch a memorable name, for example "Business Hours", then select the timezone this will apply to. For the first rule, select the days of the week and the time at which your clinic opens. In this example, we'll be setting Monday - Friday, 9AM - 5PM.

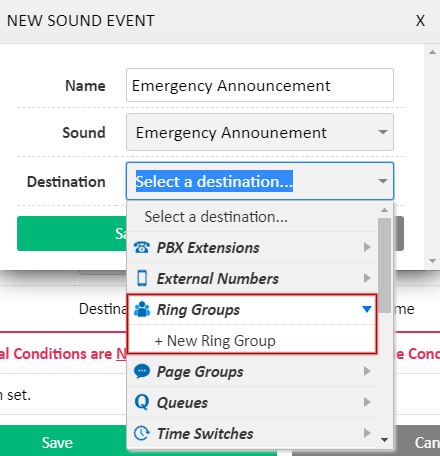
Specify a name for you sound event, for example 'Emergency Announcement'.
From the Sound drop down, select either an existing sound, or +New Sound (Record) to record the message from a connected phone, or +New Sound (Upload) to upload a sound from your computer. In this example, we'll use an announcement of "Thanks for calling the clinic. If this is an emergency please hang up now and dial 000. Please wait while we connect you to our friendly staff"
In the Destination field, choose Ring Groups then +New Ring Group

Ring Group Setup
Provide a name for your new ring group, for example Reception, then set the Ring Time to how long you'd like callers to initially ring reception before being place in the queue.
Click the +Add Agent button as many times as required to add your reception phones, then for each agent select PBX Extensions and select each reception handset.
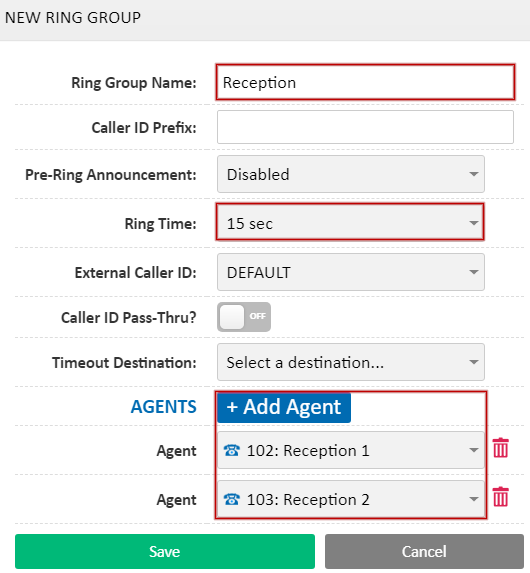
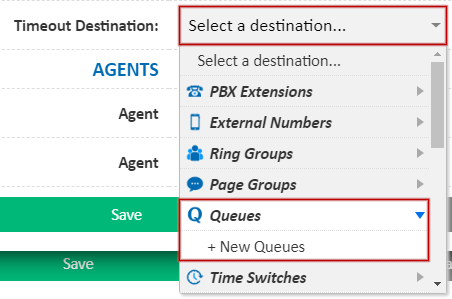
Once you've added the agents, from the Timeout Destination, choose Queues and +New Queue

Queue Setup
In the new queue window, provide a name for your queue. In this example, we'll use 'Hold Queue'.
In the Join Announcement field, select either an existing sound, or +New Sound (Record) to record the message from a connected phone, or +New Sound (Upload) to upload a sound from your computer. In this example, we'll use the announcement "All our staff are currently with other patients. Please hold the line and we'll be with you as soon as possible"
Set the Queue Timeout field to the maximum amount of time a caller should wait, before they're sent to voicemail. In this example, we'll use 3 minutes.
Click the +Add Agent button as many times as required to add the phones that should ring when there's a caller in the queue, then for each agent select PBX Extensions and select each reception handset.

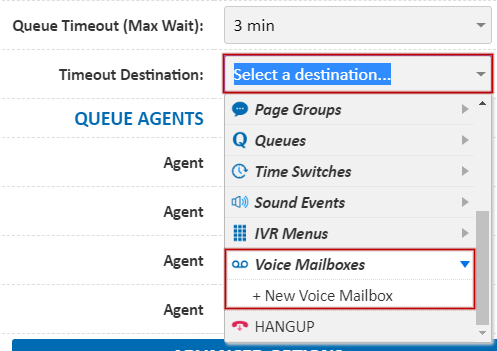
Once set, from the Timeout Destination field, select Voice Mailboxes, then +New Voice Mailbox

Voicemail Setup
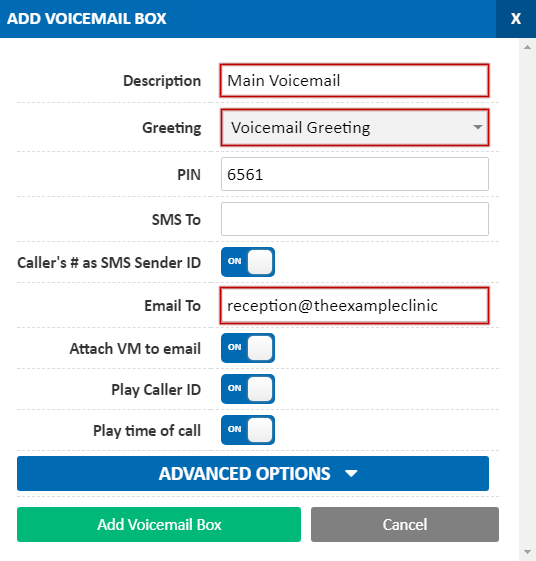
In the new voicemail window, provide a name for your voicemail.
In the Greeting field, select either an existing sound, or +New Sound (Record) to record the message from a connected phone, or +New Sound (Upload) to upload a sound from your computer. In this example, we'll use the announcement "We're sorry we couldn't get to your call, but please leave a message and we'll get back to you as soon as possible"
In the Email To field, enter the email address that any left voicemails should be sent to. We'll include a copy of the voicemail as an attachment on the email.
Once done, click Add Voicemail Box, then Save on the call queue, Save on the ring group and Save on the sound event. You'll be returned to the time switch configuration.

After Hours Setup
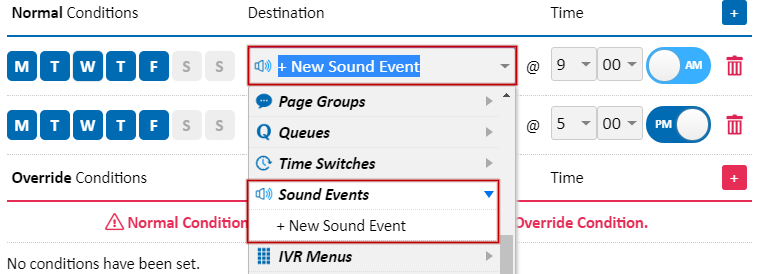
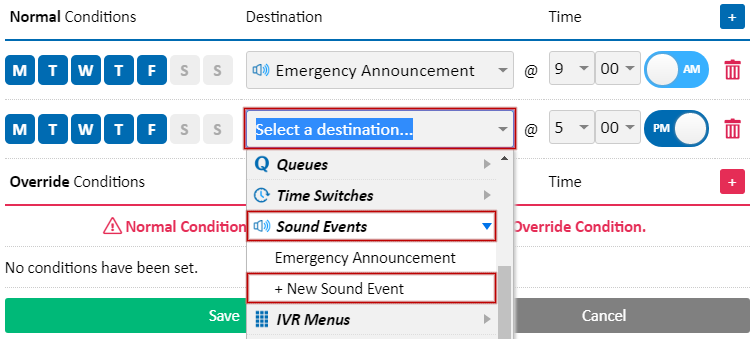
In the Destination option for your close event (5PM in this example), then select Sound Events and +New Sound Event.
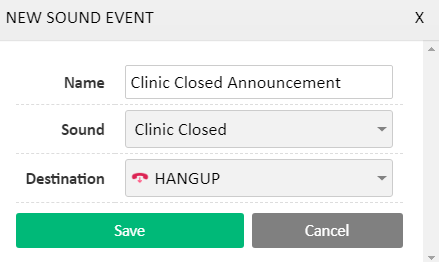
Specify a name for you sound event, for example 'Clinic Closed Announcement'.
From the Sound drop down, select either an existing sound, or +New Sound (Record) to record the message from a connected phone, or +New Sound (Upload) to upload a sound from your computer. In this example, we'll use an announcement of "Thanks for calling the clinic. If this is an emergency please hang up now and dial 000. You have called outside our practice hours of 9AM to 5PM, Monday through Friday. Please call back during these hours, where we look forward to assisting you"
In the Destination field, choose Hangup
Once set, click Save on the sound event, then Save on the time switch and Save on your number routing.
Completion
Once your phone number's route has been saved, the new configuration is in effect. Should you need to tweak any of the configuration, for example to shorten the queue, please find the relevant section under the Hosted PBX menu and click Edit as required.
 Australian Sales team about our phone system plans?