

Getting Started Guide
This guide will give a brief overview of the steps required to get your new MaxoTel service up and running, ready to make and receive calls.
The process can be broken down into the following steps, each of which is detailed below.

Signup
The first step is to signup for a new service with MaxoTel if you haven't already done so.
Order Your Phones
If you don't have any phones compatible with your new service, or are simply looking to upgrade your existing phones, we have a range of desk phones, cordless phones, conference phones and accessories available in our online shop, located at https://www.maxo.com.au/shop
To place your order, simply choose the phones you want, add them to your cart, and proceed through the checkout process. We will keep you up to date with the progress of your order.
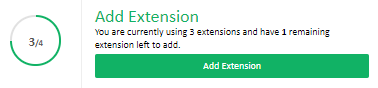
Create your Extensions
An extension is a unique identifier that your phone uses to logon to your MaxoTel phone service. Each device you will connect will need an extension setup, and, on a hosted PBX, the 3 digit number you specify when creating the extension is used for internal calls or transfers.
To create an extension, login to the My Account Portal at https://my.maxo.com.au/ then select your service type below for detailed instructions
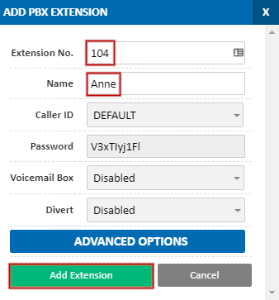
On the left hand menu, select PBX Extensions, then click Add Extension.
Choose an extension number for your device, for example 101. This is the number that will be used when calling other devices internally, or when transferring calls. Enter a display name for this extension, then click Add Extension.
Repeat this process for each extension you wish to create.
For more information on the presented options, see Portal Guide - PBX Extensions and Sip Trunks
Once all your required extensions have been created, move on to Configure your Phones.
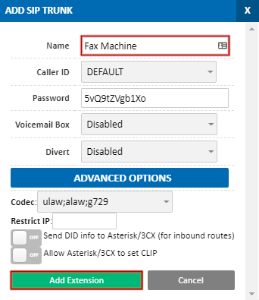
On the left hand menu, select SIP Trunks.
Each new account has a SIP trunk created automatically, however if you're connecting multiple devices and require additional SIP trunks, click Add Extension.
Enter a name for your SIP trunk and, if you're connecting an onsite PBX that requires the phone number dialled to be presented, expand advanced options and enable this option, before clicking Add Extension.
Repeat this process for any additional trunks you wish to create.
For more information on the presented options, see Portal Guide - PBX Extensions and Sip Trunks
Once all required trunks have been created, move on to Configure Your Phones
Configure Your Phones
If you purchased your phones from us, and you're on a Hosted PBX plan, once you've received them all that's required is to let us know which phone corresponds to which extension. You can do this by flipping the handset or base unit over, locating the MAC address barcode, and noting the last four characters, then calling our team on 1800 12 12 10 . Our team will allocate the handsets accordingly, then advise you to connect them when complete. Alternatively, you can add the phones to our automatic provisioning system yourself through the PBX Extensions page of the My Account Portal. For detailed instructions, please see Yealink Automatic Provisioning
If you're using cloud softphone instead, you can set this up by following the guide MaxoTel Cloud Softphone
Configure Your Call Flow
Your call flow defines what actions are taken when a call is received on your new service. This could be to send a call directly to an extension, to a mobile phone, to a group of phones, or more.
Select your service type below for detailed instructions.
A common setup involves a group of two or three phones, acting as reception. The reception users then redirect calls to other extensions as required and, if a call is not answered by reception, callers are directed to voicemail. The following steps will setup your call flow in this manner, however if you're looking for something more complex, please see PBX Setup Example, Queue with Time Switch and Complex PBX Setup Example, IVR with After Hours for ideas and guidance.
If you're not sure, or would just like some input on your planned call flow, please don't hesitate to reach out to our team, see the bottom of this article for contact information.
The below steps assume you've already created your required reception extensions. If this hasn't been done, please refer to the Create Your Extensions section above
To create a ring group, select Hosted PBX > Ring Groups from the left menu, then click Add Ring Group

Set your ring group name, for example 'Reception', then click Agents + and choose your reception handset/s in the Agent field, under PBX Extensions.
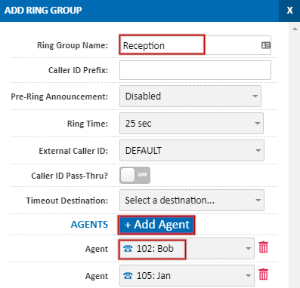
In the Ring Time field, specify how long you'd like calls to ring the phones for, before going to the Timeout Destination (voicemail, in this example)
In the Timeout Destination field, select Voice Mailboxes, then +New Voice Mailbox.
Enter a Description for your new voicemail, then optionally set the Email To and SMS To field. If email to is specified, the system will send an email notification when a voicemail is left, and optionally include the audio recording of the message (disable with Attach VM to email). If a mobile number is specified, a text message with a transcription of the message will be sent to the mobile number nominated.
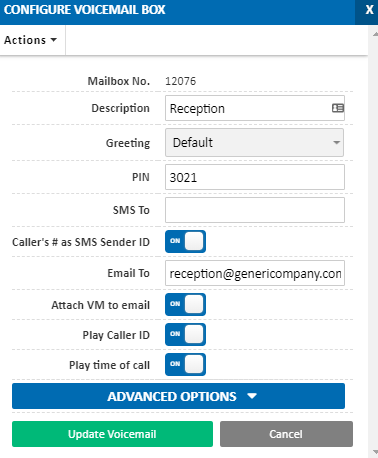
Once completed, click Add Voicemail Box and you will be returned to your ring group setup. The timeout destination field will now have your new voice mailbox specified. To finalise, click the Add Ring Group button, then follow the steps under Ordering a Number below to activate the configuration.
For additional information on ring groups, please see Portal Guide - Ring Groups, or for voicemail options, see Portal Guide - Voicemail
A common SIP trunking setup is to have inbound calls dial a SIP trunk and, if this is unanswered, try another SIP trunk before sending the caller to Voicemail.
If you're not sure, or would just like some input on your planned call flow, please don't hesitate to reach out to our team via the contact information at the bottom of this article.
The below steps assume that you have already created any required extensions. If this hasn't been done, please refer to Create Your Extensions above.
To begin the overflow/failover setup, navigate to SIP Trunks, then choose Edit on your primary (first) device. In the Divert field, set the amount of time it should try this device before going to the next (eg. Busy/30s)
In the Divert To field, select the second SIP Trunk, then click Update Extension.
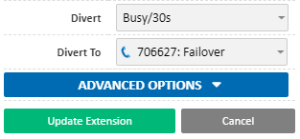
Repeat this process on the second trunk, but in the Divert To field, select Voice Mailboxes, then +New Voice Mailbox.
Enter a Description for your new voicemail, then optionally set the Email To and SMS To field. If email to is specified, the system will send an email notification when a voicemail is left, and optionally include the audio recording of the message (disable with Attach VM to email). If a mobile number is specified, a text message with a transcription of the message will be sent to the mobile number nominated.
Once completed, click Add Voicemail Box and you will be returned to your extension setup. The divert to field will now have your new voice mailbox specified. To finalise, click the Update Extension button, then follow the steps under Ordering a Number below to activate the configuration.
For additional information on voicemail options, see Portal Guide - Voicemail
Order Phone Numbers
Before you can start receiving inbound calls on your service, you need to assign a phone number. Numbers are available for instant setup for all capital cities and a range of regional centres.
If you're porting over an existing number to your new service, we still recommend ordering a phone number. This allows you to divert your current number and start using your new system while waiting for the port to complete.
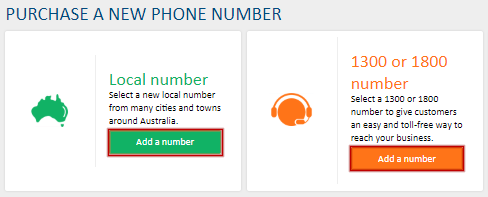
To order a new number, select Number Routing, then select the Add a Number button corresponding to your desired number type. For this example, we'll order a local phone number.
In the Location field, select the location you'd like a number for. From the presented list, select one or more of the presented individual numbers or number ranges.
The system will show you any applicable charges for your number selection. If you need to remove a number, you can either deselect it in the number list, or click the X in the charge summary table.
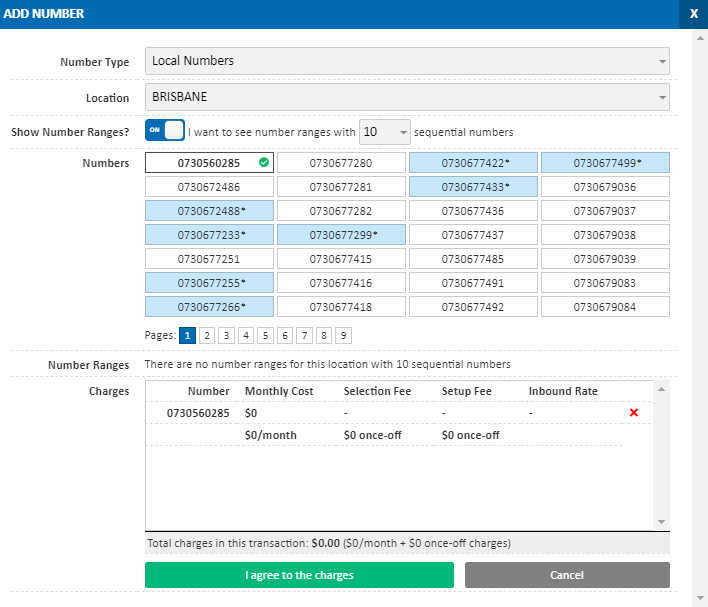
Once you're happy with the selection, click I agree to the charges and the number will be allocated to your account.
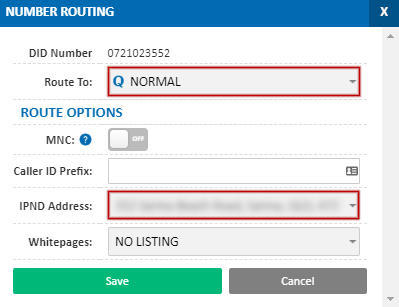
Locate your new phone number in the Current DIDs list, then click the Edit button.

In the Route To field, choose where calls to this number should be delivered. If you're using the above Hosted PBX example, select Ring Groups and the ring group created earlier. For the above SIP Trunk example, choose the first SIP Trunk in your call flow.
In IPND Address, select the location this number will be primarily used at. For information on IPND addresses, please see What is IPND?
You can repeat this as many times as required for additional phone numbers.
For additional information on ordering or updating phone numbers, please see Portal Guide - Number Routing
Submit Any Number Ports
Number porting is the process by which you move your existing phone numbers from your current carrier to your new MaxoTel service.
If you are setting up a new service, or don't want to port your numbers at this time, you can skip to Start Using Your Service.
Before submitting a new number port, ensure you've read the porting checklist, which lists important information and FAQs on the porting process.
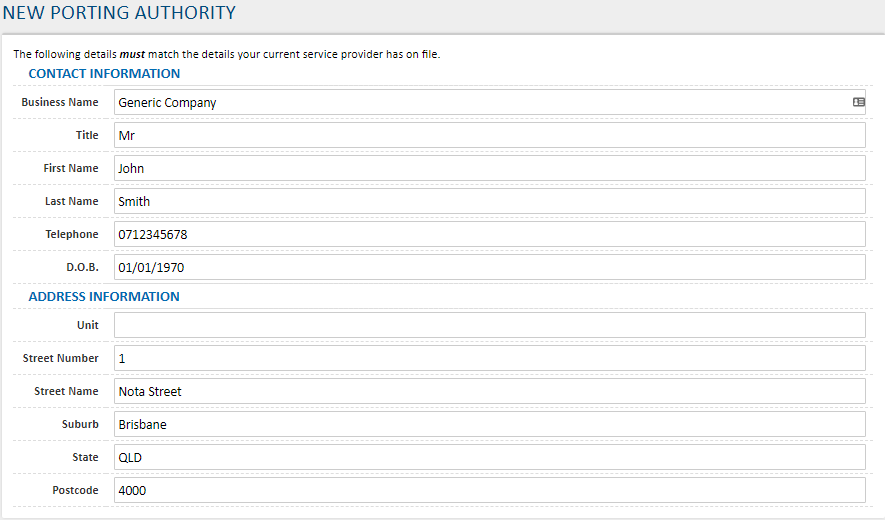
Once done, fill in the contact information and address information, exactly matching the details the current provider has on record. Note that PO Boxes can't be used when filling in this form.
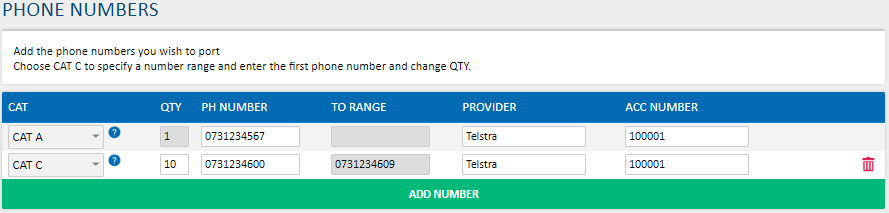
The Phone Numbers table provides fields to enter your port category, the amount of numbers in your range (if applicable), the phone number (or the start number, if porting a range), the current number carrier and the current carrier's account number.
To help determine if the port should be Cat A or Cat C, please refer to Number Porting FAQ - Category A or C
This example shows a simple (cat A) number port, along with a range of 10 numbers (cat C)
For each number being ported, you will need to verify ownership. For a Cat A number, this can be either by phone call verification or bill, or for Cat C, bill only. For more information on verification, see Number Porting FAQ - Verification Options
Carefully read and accept the porting terms and click submit port to initiate the number transfer. You will receive updates via email as the port progresses, and can return to the number porting page at any time to check on the port's progress.
For additional information on tracking your number port progress, please see Portal Guide - Number Porting
Start Using Your Service
You can now begin making and receiving calls as normal.
To call out, enter the destination phone number as you would normally - you don't need to prefix it with 0 to get an outside line. At this stage you may wish to set your default outbound caller ID. To do so, please refer to Setting the default Caller ID for Outbound Calls
Any incoming calls to your numbers will follow the call flow you set up previously. If you'd like to setup voicemail for individual extensions, please see Setting up Voicemail
For additional information on other available features or My Account Portal sections, refer to Portal Overview
 Australian Sales team about our phone system plans?